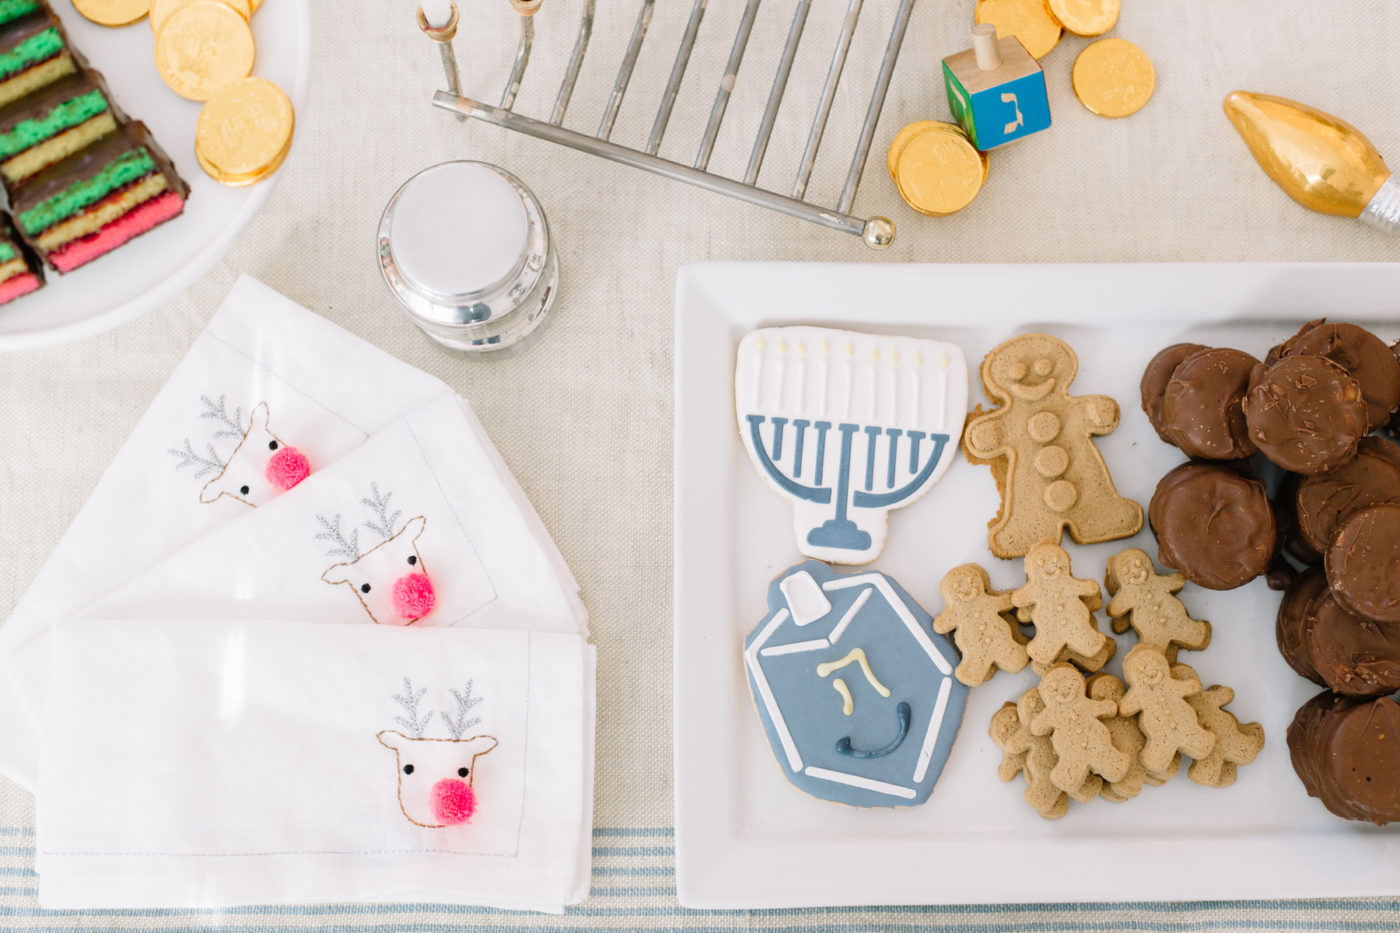
I don’t know if you remember the television show, The OC, but I certainly do. It was one of my all time favorite tv shows growing up. In that show, they coined the term, “Chrismukkah” and it’s stayed with me ever since. We were able to celebrate Chrismukkah this season with a cookie exchange with friends from both faiths- Jewish and Christian. Many of our closest friends celebrate Hanukkah and it’s lovely to celebrate with them. Makes the season even more enjoyable to get a slice of celebration a bit earlier than the traditional Christmas of Dec 25.


For many years, I’ve participated in another really large cookie exchange and it really is fun – so, this year, I took that idea and applied it to a Chrismukkah cookie exchange.
Here’s how to do it…
- Gather a group of friends and each select a cookie recipe knowing it will be judged based on three factors; prettiest cookie, best tasting cookie and most festive.
- Everyone must submit the type of cookie they are making as to not have repeats.
- Each participant must bake enough for the entire group to take home approx 5 cookies each.
- Prizes are involved for each category, which makes it all the more fun.
- Make sure you provide a cute cookie container/tin for each participant to take their cookies home.
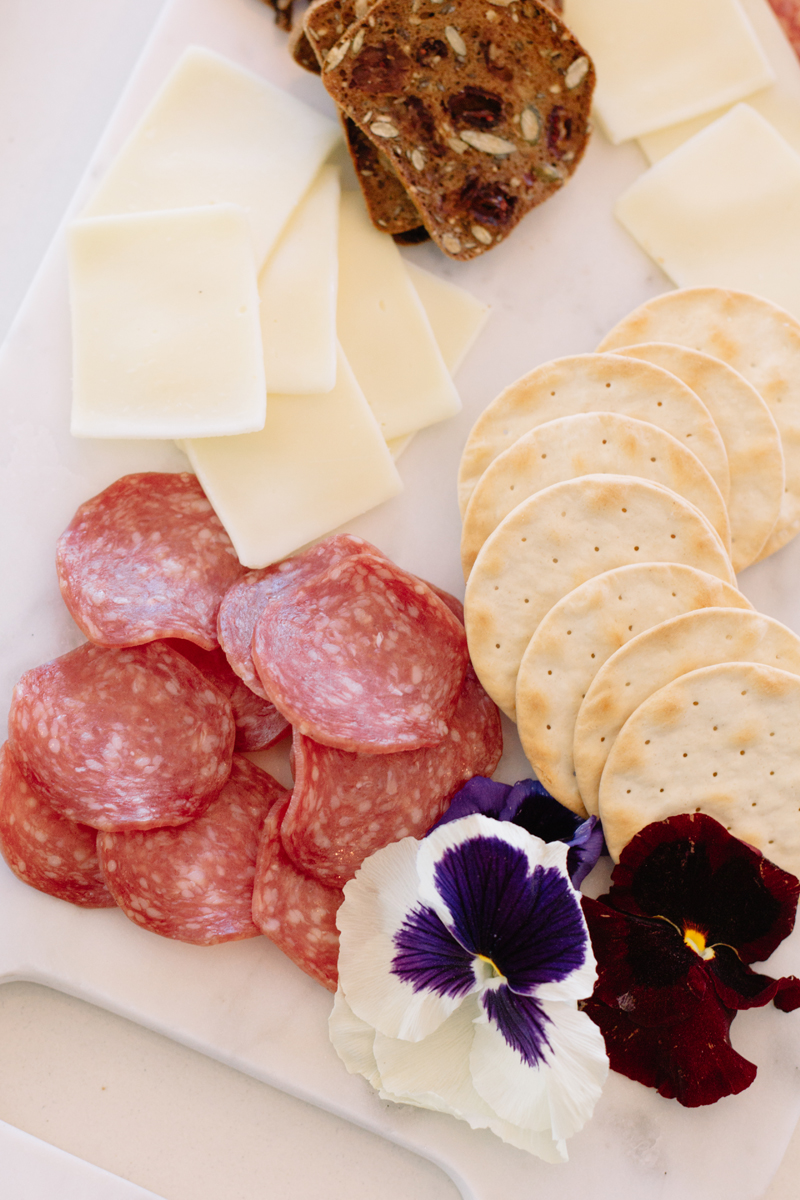
- You also want to serve refreshments- we had charcuterie along with cranberry mimosas!
Who doesn’t enjoy a stiff competition? We certainly do between the three of us AOBF girls!


We recently moved into a new house in The Port Streets, so, I hosted at our new place. It was fun to show off the new pad and to have a bit of festive fun under a new roof. We christened the house with Chrismukkah.


See below for the recipes to each cookie and also for our tallies on who won which category.
Prettiest Cookie Winner :: Hayley (see recipe below)
Best Tasting Cookie Winner :: Alatheia (see recipe below)
Most Festive Cookie Winner :: Chris (see recipe below)


Kirby Kurzeka’s Cookie ::
Not-So-Naughty Thumbprint Cookies (No Gluten, No Sugar)
Yields about 1 dozen cookies
INGREDIENTS:
- 2 cups almond flour
- 1/4 cup coconut oil (melted)
- 1/4 cup maple syrup
- 1 tsp vanilla extract
- 1 tsp cinnamon
- 1/2 tsp baking soda
- 1/2 tsp Himalayan pink salt
- For the jam:
- 2 cups raspberries
- 2 Tbsp lemon juice
- 2 Tbsp maple syrup
DIRECTIONS:
Preheat oven to 350. Prepare a cookie sheet by lining with parchment paper.
First, prepare the jam:
Place all ingredients for jam in saucepan and cook raspberries with the maple syrup and lemon while gently smashing berries. Allow berry mixture to come to a soft simmer for about 5 minutes. Set aside and allow to cool.
While jam is cooling, prepare cookie dough:
Place almond flour, maple syrup, coconut oil, baking soda, salt, vanilla extract and cinnamon in a bowl. Stir gently. Scoop 1-2 tablespoons of batter from bowl, and form into a ball. Place cookie dough on prepared sheet. Press thumb into center of cookie dough ball.
Fill imprint with jam. Repeat with remaining dough and jam.
Bake cookies 8-10 minutes, until golden brown and jam is bubbling. Allow to cool 10 minutes. Top each thumbprint with additional jam, if desired. Enjoy!
Note: Cookie dough and jam can be made up to five days ahead and refrigerated until use.
Cassie Helda’s Cookies ::
White Chocolate Dipped Gingerdoodles
yield: 2 DOZEN
total time: 30 MINUTES
prep time: 15 MINUTES
cook time: 8 MINUTES
Ingredients:
- 3/4 cup salted butter, softened
- 1 cup brown sugar
- 1 large egg
- 1/4 cup molasses
- 2 1/4 cups flour
- 2 teaspoon baking soda
- 1 teaspoon cinnamon
- 1 teaspoon ground ginger
- 1/2 teaspoon ground cloves
- 1/4 teaspoon salt
- 1/4 cup granulated sugar (for rolling the cookies)
- 1 to 2 cups white chocolate melting wafers (for dipping the cookies)
Directions:
Pre-heat the oven to 375°F. Line a baking sheet with parchment paper and set aside.
Combine the butter and sugar in a large bowl. Cream for one minute, or until fluffy. Add in the egg and beat until smooth. Next add in the molasses and beat until well combined. Place the flour, baking soda, cinnamon, ginger, cloves and salt into a sifter (if you don’t have a sifter, whisk in a bowl), and then add to the butter mixture. Mix until combined.
Using a medium cookie scoop (or about 1.5 Tablespoons), roll the cookie dough into a ball. Place the granulated sugar into a shallow bowl and then roll the dough into the sugar. Place on the baking sheet, about 2 inches apart.
Bake for 7 to 8 minutes (do not let the edges brown), or until the edges are firm. Allow to cool on the pan for 2 minutes and then transfer to a cooling rack. Allow to cool.
Dip in melted chocolate if desired.
Stacey Gillis’ Cookies ::
Ingredients
- 2 1/2 sticks unsalted butter, cut into pieces and softened, plus more for the pans
- 2 cups all-purpose flour, plus more for the pans
- 8 ounces almond paste
- 1 cup sugar
- 4 large eggs, separated
- 1/2 teaspoon kosher salt
- Red and green food coloring (gel preferred)
- 1 15-ounce jar smooth apricot jam
- Cooking spray
- 1 pound bittersweet chocolate, chopped
Directions
Special equipment: You’ll need three 9-by-12-inch jelly roll pans or rimmed baking sheets to make these layered cookies.
You’ll need three 9-by-12-inch jelly roll pans or rimmed baking sheets to make these layered cookies.
Prep the pans: Position racks in the upper and lower thirds of the oven; preheat to 350 degrees F. Butter and flour three 9-by-12-inch jelly roll pans or rimmed baking sheets and line with parchment paper.
Make the batter: Combine the almond paste and 3/4 cup plus 2 tablespoons sugar in a stand mixer fitted with the paddle attachment. Mix on medium speed until the mixture is in fine crumbles. Beat in 2 1/2 sticks butter, a few pieces at a time, until well combined. Beat in the egg yolks, one at a time, until smooth.
Sift 2 cups flour onto a sheet of parchment and sprinkle the salt on top; add to the mixer bowl and beat until just combined.
In a clean bowl, whisk the egg whites until foamy; while whisking, slowly add the remaining 2 tablespoons sugar and whisk until firm peaks form (or use a hand mixer). Fold about one-third of the egg white mixture into the batter with a rubber spatula, then gently fold in the rest. The batter should be fluffy.
Color the batter: Divide the batter evenly among 3 bowls. Stir enough red food coloring into 1 bowl to make a deep salmon color. Stir enough green food coloring into another bowl to make a medium green color. Leave the third bowl uncolored.
Bake the layers: Transfer the batter to the prepared pans (one pan for each color). Dip an offset spatula in water and spread the batter to the edge of each pan, smoothing the tops. Bake, switching the position of the pans halfway through, until the cakes are cooked through and just beginning to brown around the edges, 8 to 10 minutes. Let cool completely in the pans on wire racks.
Assemble the layers: Spread half of the jam evenly over the green cake layer almost all the way to the edges. Unmold the plain cake layer by inverting it onto another pan or cutting board; peel off the parchment.
Carefully slide the plain layer onto the green layer (use a wide offset spatula to help you, if necessary). Spread the remaining jam on top of the plain layer. Unmold the red cake layer and slide it onto the plain layer.
Cover the cake with plastic wrap and top with one of the empty pans; place several heavy cans on top to weigh down the layers. Refrigerate at least 4 hours or overnight.
Unmold the cake: Remove the cans and plastic wrap. Place a cutting board on top of the cake and flip to unmold it onto the cutting board. Remove the parchment from the top of the green layer.
Trim the cake: Trim the sides with a knife to make straight edges. Spray a wire rack with cooking spray; set the rack over a baking sheet. Carefully slide the cake onto the rack, using a wide offset spatula to help you, if necessary.
Cover in chocolate: Melt the chocolate in a heatproof bowl set over a pan of simmering water; pour over the cake. Dip an offset spatula in the hot water and smooth the top and sides. Let set slightly. Scrape wavy lines into the chocolate with a fork; let cool a few more minutes until the chocolate is mostly set but still slightly tacky.
Cut into pieces: Slide the cake back onto the cutting board. Slice crosswise into 6 strips, then cut each strip into 8 rectangular pieces. For clean edges, dip the knife in warm water and wipe it with a cloth between cuts. Store in an airtight container at room temperature for up to 1 week.
If the lines in the chocolate don’t hold their shape, let the chocolate set a little longer and try again.
Alatheia’s Cookies ::
RITZ CRACKER CHOCOLATE PEANUT BUTTER COOKIES
Ingredients
- 60 Ritz Crackers
- Creamy peanut butter
- 12 ounces milk or dark melting chocolate
- 8 ounces white melting chocolate
- 6 ounces butterscotch baking chips
Instructions
Make peanut butter sandwiches with two Ritz Crackers and peanut butter.
Melt the milk/dark chocolate, white chocolate, and butterscotch baking chips together in a double boiler.
Dip sandwiches in melted mixture and put on a cookie sheet. Once the sheet is full, place it in the freezer until the cookies are frozen.
Store in a zip lock bag in the freezer.
Recipe Notes: I’ve gotten the best results with Ghirardelli or Guittard’s melting wafers for these cookies.
Hayley Mann’s Cookies ::
Peppermint Chocolate Chip Snowball Cookies
INGREDIENTS
- 1 cup butter, room temperature
- 2 cups flour
- 1/2 cup powdered sugar
- 1 teaspoon vanilla
- 1/4 teaspoon salt
- 3/4 cup mini chocolate chips
- 1/2 cup Powdered sugar for rolling
DIRECTIONS
Preheat oven to 350° and line a cookie sheet with parchment paper.
In a large bow, combine butter, flour, and powdered sugar. Stir until well combined.
Add in salt and vanilla and mix until smooth.
Fold in chocolate chips and scoop into balls- about 1 tablespoon each.
Bake for 17-18 minutes.
Let cool for a couple minutes, then roll in powdered sugar.
Let cool completely and roll in powdered sugar one more time.
Add crushed peppermint to the tops of cookies.
Christine Anderson’s Cookies ::
Cranberry-Pistachio Cookies with Coconut and White Chocolate
Makes about 36
- 1 cup unsalted butter, softened
- 1 cup granulated sugar
- 1 cup firmly packed light brown sugar
- 2 large eggs
- 1 tablespoon vanilla extract
- 2 1/2 cups all-purpose flour
- 1 teaspoon baking powder
- 3/4 teaspoon salt
- 1/4 teaspoon ground cinnamon
- 1 ( 11-ounce) bag white chocolate chips
- 1 1/2 cups sweetened flaked coconut
- 1 cup roasted pistachios, chopped
- 1 cup dried cranberries
- 1 tablespoon sea salt ( Maldon flakes if available)
- In a large bowl, beat butter and sugars with a mixer at medium speed until fluffy, 3-4 minutes, stopping to scrape insides of bowl. Add eggs,
one at a time, beating well after each addition. Beat in vanilla. - In a medium bowl, whisk together flour, baking powder, salt, and cinnamon. With mixer on low speed, gradually add flour mixture to butter mixture,beating well after each addition. Fold in white chocolate morsels, coconut, pistachios, and cranberries. Wrap dough in plastic wrap, and refrigerate for at least 2 hours or up to 3 days.
- Preheat oven to 350 degrees. Line baking sheets with parchment paper.
- Using a small spring-loaded scoop, drop dough 2 inches apart onto prepared pans. Sprinkle with sea salt.
- Bake until light golden brown around the edges, 10-12 minutes. Let cool on pans for 10 minutes. Remove from pans, and let cool completely on wire racks.
Store in airtight container for up to 5 days.